|
|
How to create a bot for Google Home and Google Assistant |
|
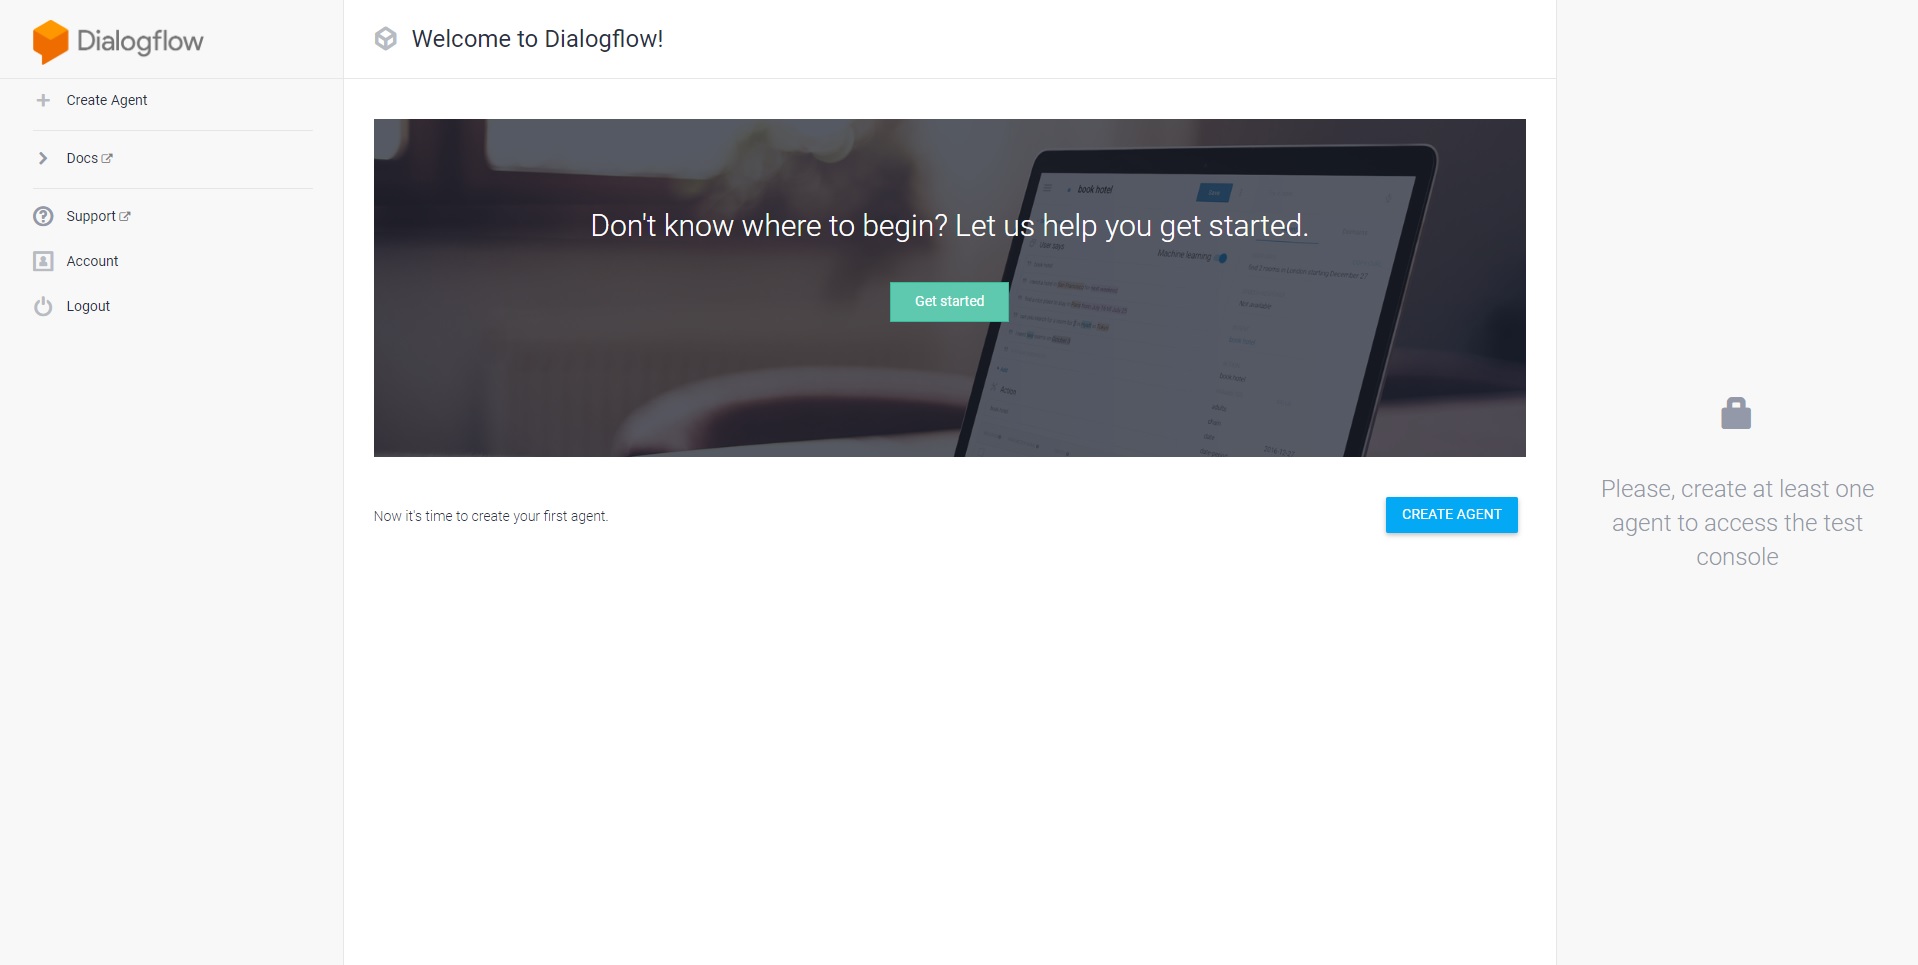
Through Bot Libre, you can now use your own bot to send and receive messages on Google Home or any other Google Assistant-compatible device. This "How To" will give you a step by step process to connect your bot with Google Assistant. Note: A previous version of this blog post begins by creating an Action in the Google Actions Console. However, that procedure no longer works due to changes that Google has made to Actions. The Dialogflow Agent must be now be created first. Step 1 - Create a Bot First you must create a bot that you want to connect to Google Assistant, or you can use one of your existing bots. To create a bot, follow the instructions here: How to create your own chat bot in 10 clicks. Step 2 - Create a new Dialogflow Agent Go to https://dialogflow.cloud.google.com/ and sign in to your Google account. Click the "+ Create Agent" button to continue.
Enter an agent name and select your language and time zone, then press "Create" to continue.
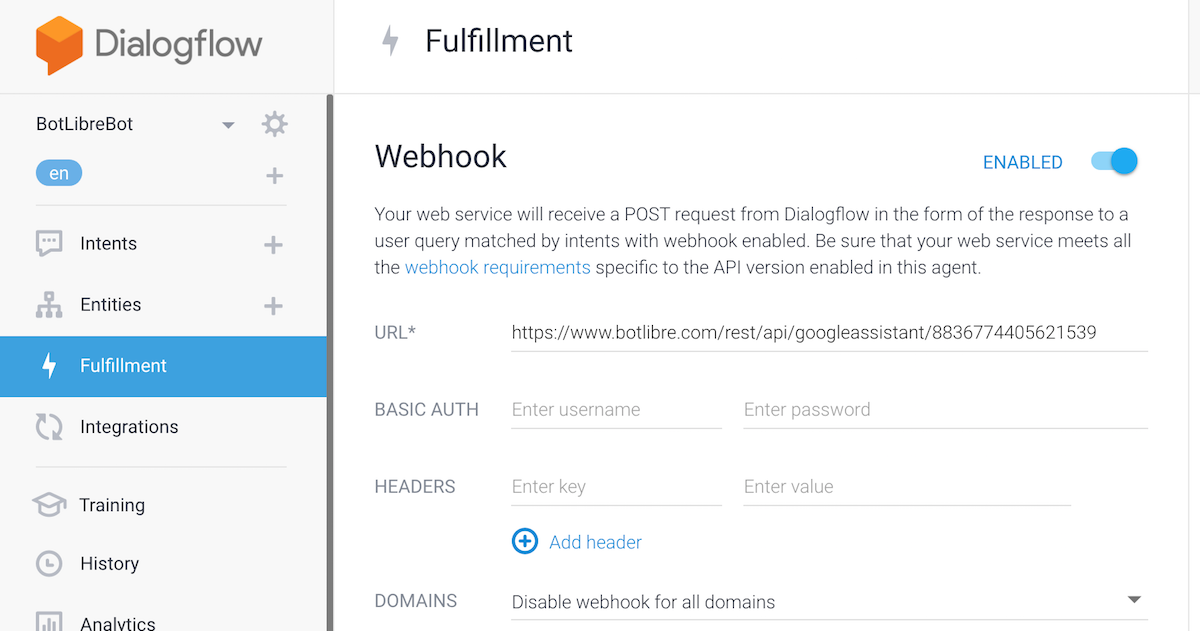
Step 3 - Configure Dialogflow Agent Click the "Fulfillment" option on the left sidebar. Then, click the "Webhook" toggle to enable it, then return to the Bot Libre website.
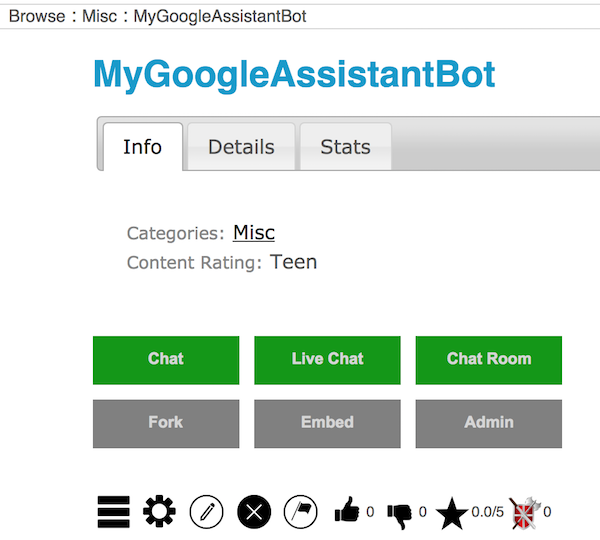
On the Bot Libre website, navigate to your bot's Admin page by clicking the gear icon on your bot's page.
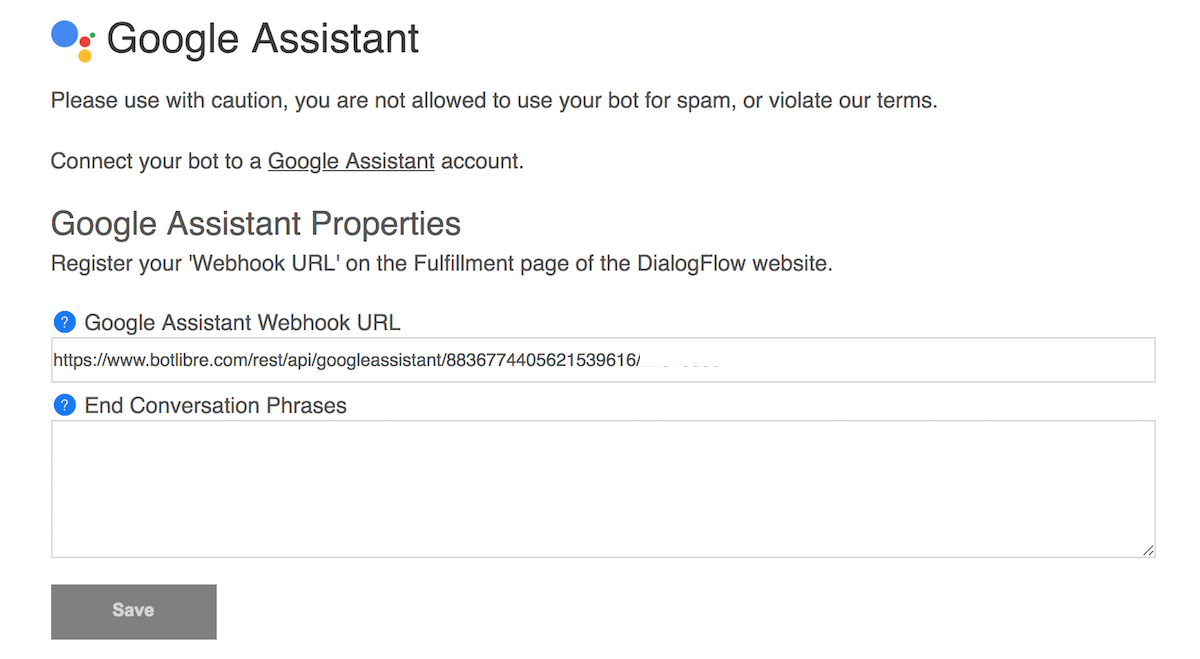
Select the "Google Assistant" link on your bot's Admin page to continue to the next screen.
Copy the "Google Assistant Webhook URL" to your clipboard and return to the Dialogflow website. Paste the URL into the "URL" field, then scroll down and press the "Save" button.
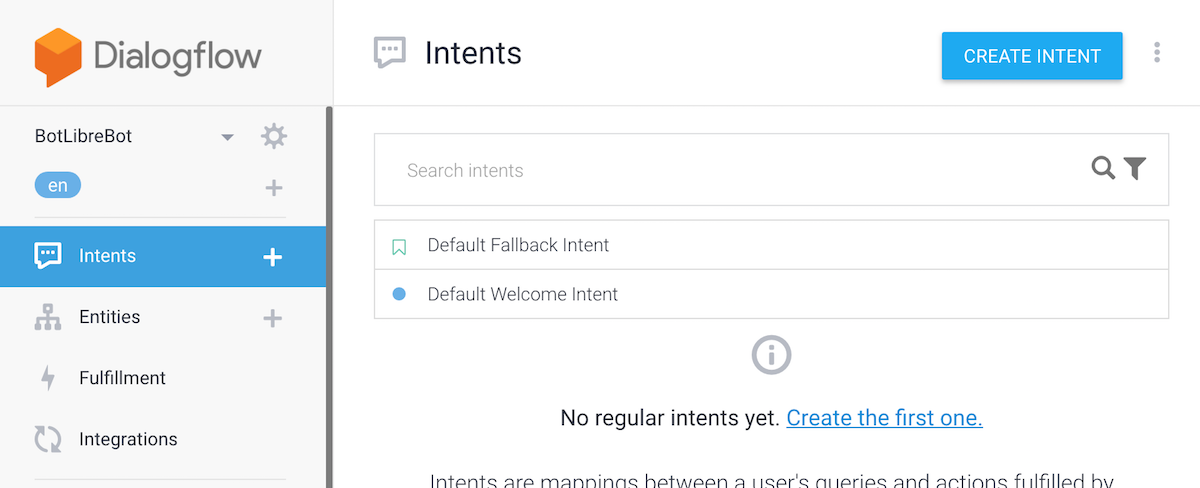
Next, click the "Intents" option on the left sidebar.
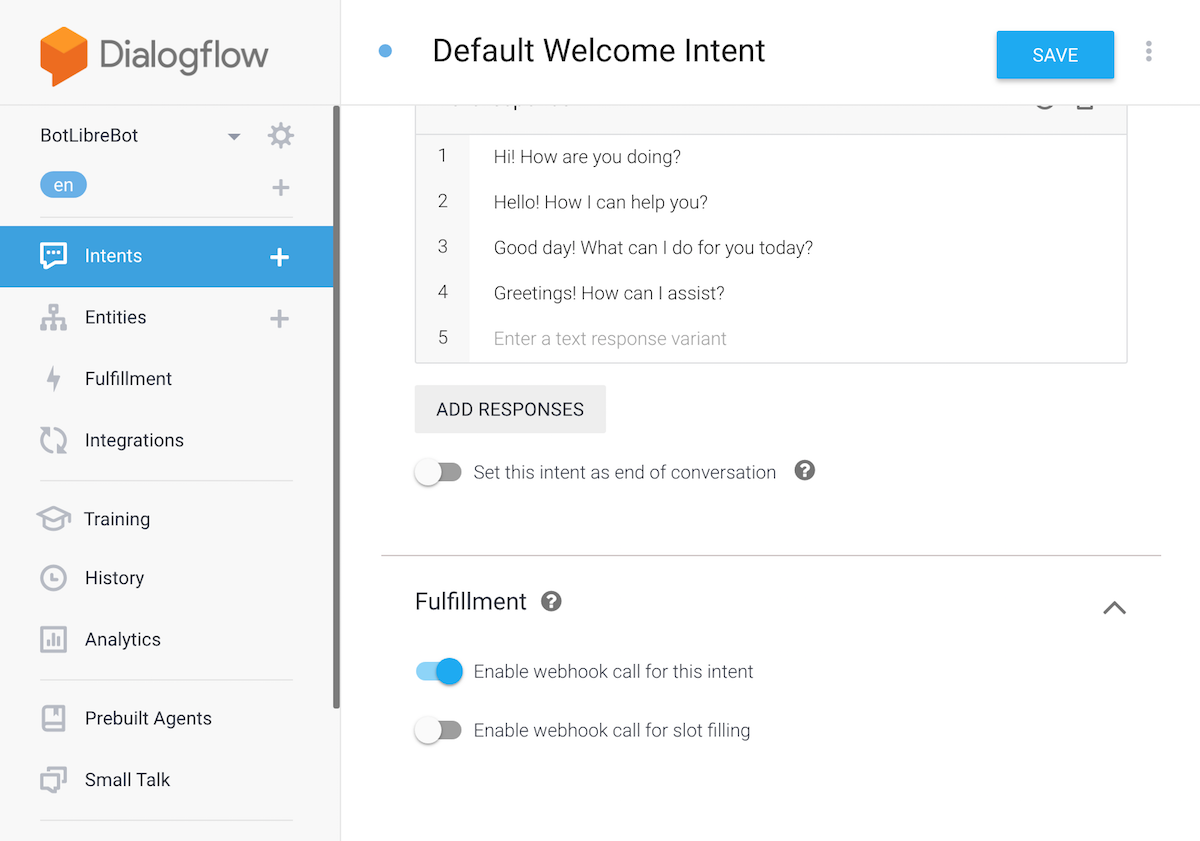
Click on "Default Fallback Intent". Scroll to the bottom of the page and expand the Fulfillment section. Toggle "Enable webhook call for this intent" to the on position. Press the "Save" button. Repeat the same process for the "Default Welcome Intent".
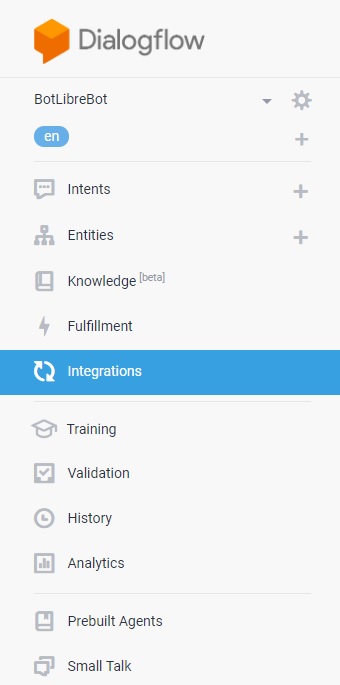
Step 4 - Integrate with Google Assistant Click the "Integrations" option on the left sidebar.
Under "Google Assistant", click on "Integration Settings". This will bring up the integration popup for Google Assistant.
Click on "Test" at the bottom of the popup. This will create a new project for Google Assistant, with Dialogflow integrated as an Action.
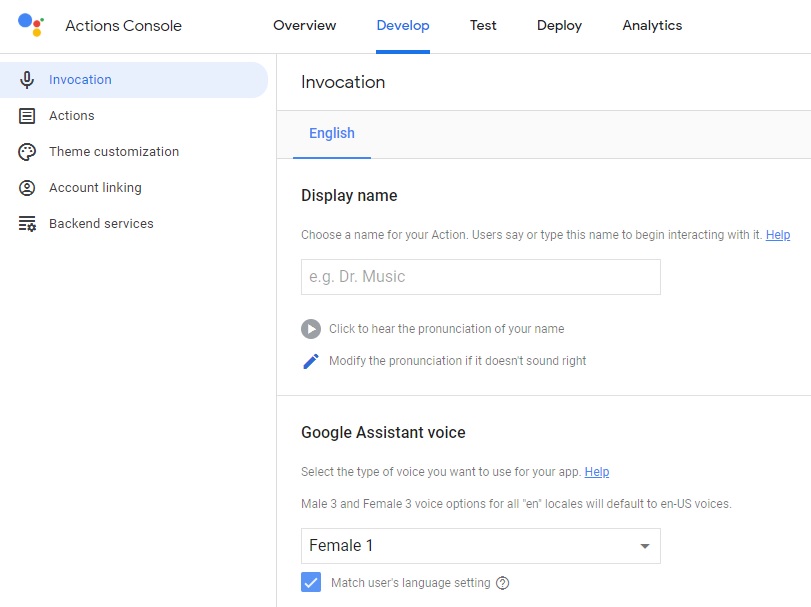
A new tab will appear for the Actions Console, with your new project opened. Step 5 - Google Assistant Action Settings On the top navigation bar in the Actions Console, click on "Develop".
On the left sidebar, select the "Invocation" option. From here, you can enter a "Display name" which the user will say or type to begin interacting with your bot. You can also select a voice that your bot will use on Google Assistant.
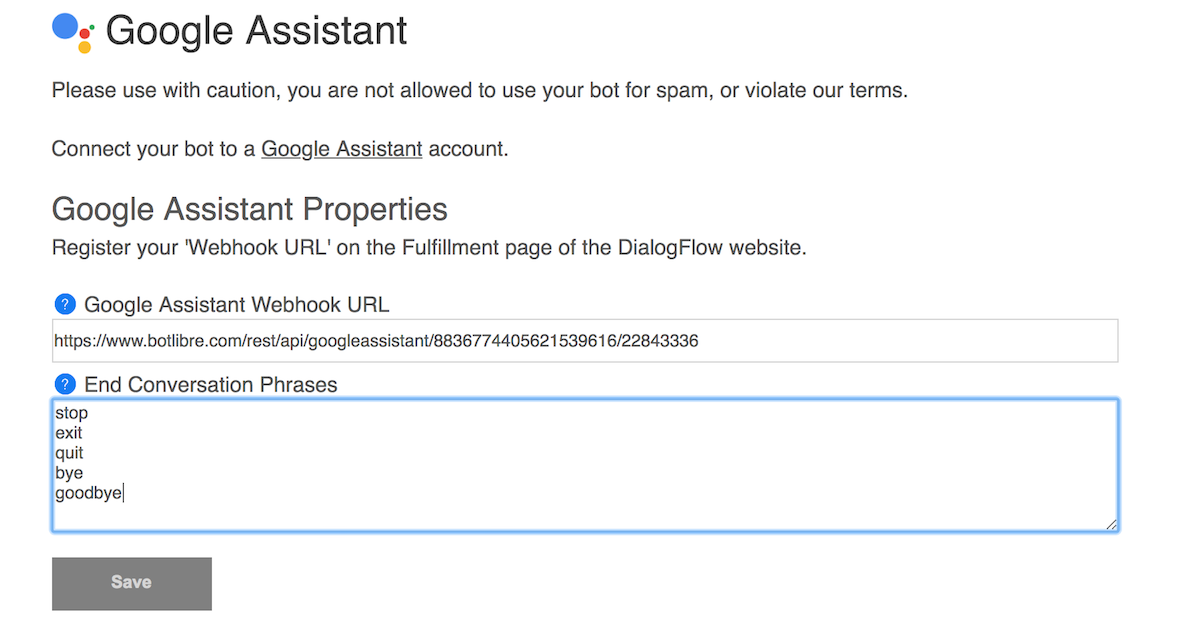
Press "Save" when finished. Step 6 - Bot Libre Settings You may now close the Dialogflow website and return to your bot's Admin page on the Bot Libre website. In the "End Conversation Phrases" box, enter some phrases/words the user can say that will cause the conversation to end.
Click the "Save" button when finished. Step 7 - Finish You should now be able to test your bot using the Simulator available on the the Google Actions Console by clicking on "Test" in the top navigation bar. Alternatively, you can test your bot on any device associated with the Google account used to create your Google Assistant action. To test using the simulator, make sure the "Web & App Activity", "Device Information", and "Voice & Audio Activity" permissions are enabled on the Activity controls page for your Google Account.
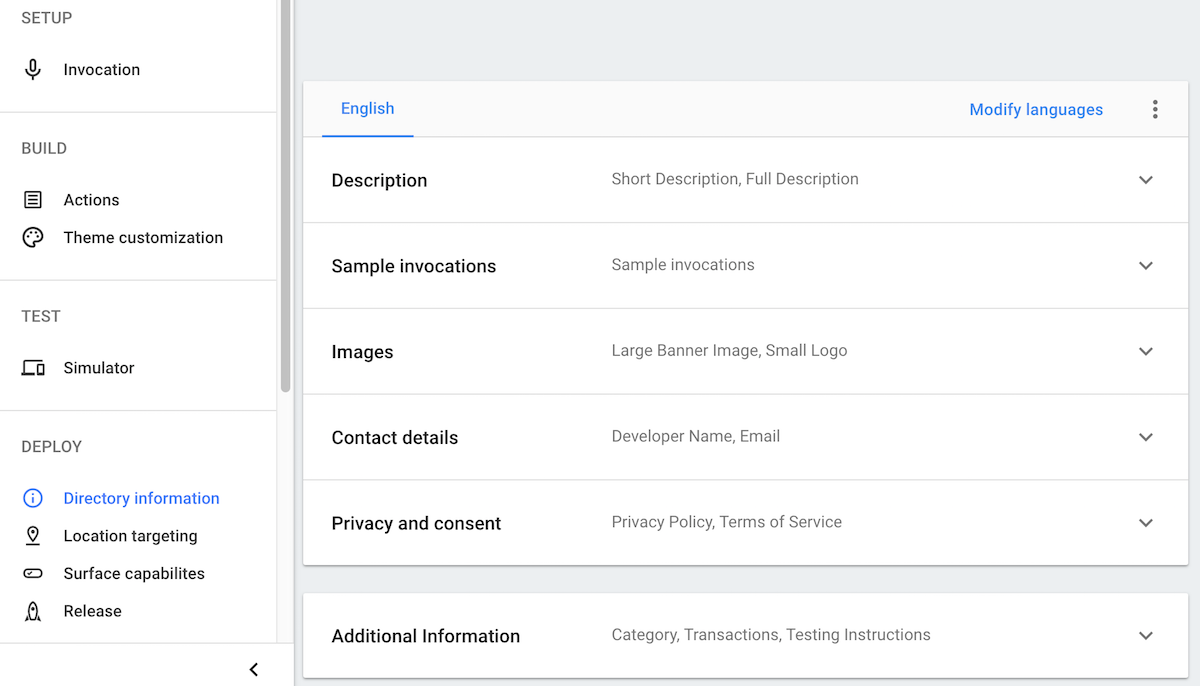
Note: Do not test the bot from the Dialogflow website, since they use a different API. To make your Google Assistant Action available to the public, click on "Deploy" in the top navigation bar. Then, click on "Directory information" option in the left sidebar and fill out the required information.
Next, click the "Release" option in the left sidebar. If all necessary information has been completed, you will be able to click the "Submit for Production" button to make your bot available to all Google Assistant users.
Your bot will now be able to send and receive messages on Google Home or any other Google Assistant-compatible device. If you encountered any issues, or would like help setting up your bot please email us at [email protected] or upgrade to our Platinum service and we can build your bot for you. You can now also talk to the Bot Libre Help Bot, Brain Bot, and Julie on Google Home and Google Assistant. say "talk to Bot Libre" (lee bra) to talk with the Bot Libre Help Bot say "talk to Brain chatbot" to talk with the Brain Bot say "talk to Julie chatbot" to talk with the Julie |
|
|
|
|
|
|


